
A surprise Ballroom<em>I got it into my head that I needed to make the roof of the main building more magical, so I did…</em>
I mentioned a couple of journal entries ago that quite a lot of the elements of the Vale of Araluen were placeholder models and I was viewing this an issue, a failing on my part. But I’ve come to realise that this is just part of my process, my figuring out and concepting phase. The phase where I rough something out, stare at it for an inordinate amount of time and then gradually completely rebuild it, making it infinitely more complicated in the process! If you’re thinking ‘you like making work for yourself’ trust me, you would not be the first person to say that to me!
This realisation is more important than I first thought, because it is essentially a reframing of a situation from a problem to just part of the artistic process. Where I used to work we had this horrendously toxic philosophy of ‘right first time’, which I know is not humanly possible and that it is essentially setting yourself up for failure - especially in a research and development environment. But spending over a decade working in that sort of environment warps how you think and what you expect from yourself. It causes you to think that if you don’t get something 100% perfect the first time, you are an idiot, it makes you second guess yourself constantly and over time it crushes your self confidence and esteem. Which in turn causes you to procrastinate to an olympic standard.
So for me, it was slightly surreal to just sit back and think, oh this is just how I work and it’s totally fine to gradually refine and evolve something. I’m sorry if this is a ‘stating the obvious’ moment but for me it’s a big shift in both thinking and expectations.
Two areas of the castle I wanted to evolve are the orangery windows and the central roof, or more specifically the ballroom roof. (wow, that's a sentence I never thought I'd type!) I know ballrooms are a bit of controversial topic at the moment especially for those of you living on the other side of the pond, but I can assure you that no historic buildings have been damaged in the making of this one and there are certainly no billionaires bankrolling it.

Flyby of Castle Araluen with its new ballroom dome and orangery windows
The Ballroom
The concept for the ballroom roof was inspired by ‘The Great Court’ at the British Museum which took my breath away when I first walked into the space. It's a truly stunning piece of architecture and engineering. I also wanted to infuse the design with an art deco meets steam punk spin to give it both an opulent and magical vibe. So I spent a day drawing something extremely complicated (the V1 design), decided it was way too much and then spent another day distilling it down to the design (V2) you see below.


Building on the lesson I learned when I designed and built the portico, namely ‘more detail = more interesting lighting effects’ I spent quite a while working on the faceting of the glass dome to give it a gemstone like quality (because I like sparkly things!). Each framed triangular glass pane is divided into three sub triangles and I’m really happy with how it looks. I’ve always loved the beautiful geometric patterns that are a feature of Islamic art and architecture and this is my nod to them. I built the dome using a combination of sculpting techniques starting with an ico sphere and added some geometry nodes to create the faceting pattern I wanted. I adapted this tutorial pretty significantly, but if you’re looking to create something similar it’s a very useful starting point.

‘Drone shot’ over Castle Araluen
The ballroom roof wasn’t originally on my list to work on during this two week block, but I started thinking about it last weekend and once the seed of the idea took root in my brain I had to try and figure out how to build it. It ended up taking just over two days to create and light the ballroom dome and it’s now my favourite feature of the castle, I’m really glad I pushed myself to figure out how to build it. I very nearly didn’t attempt it thinking there was no way with my current skill level I could do it, but I think it’s added a really magical vibe to the castle. Definitely one for the ‘if you don’t try you’ll never know’ pile.
Orangery Windows
I did the orangery windows in two blocks, first creating the slimmer versions that you see on the front and back facades then I did the ballroom roof and after that I went back and created the bigger windows on the end walls. The windows themselves were the easy bit, trying to get the booleans to cut the holes out of the walls was the fiddly bit but I got there eventually.
My design reference for the orangery windows is the beautiful orangery at Kew Gardens (where they serve amazing cake!). I've simplified the design a bit and also changed the stonework framing around them to a stepped frame design. Those of you who know me well will know I have an obsession with orangeries, lots of light, beautiful architecture and exotic plants, yes please.


I’ve tried to make it easier to see the difference between my initial orangery window scheme and the upgraded design with a before and after shot of the front of the castle from the same camera position. Let me know in the comments if you have any suggestions for how I can do this better. Hopefully you’ll agree the new windows are big improvement!
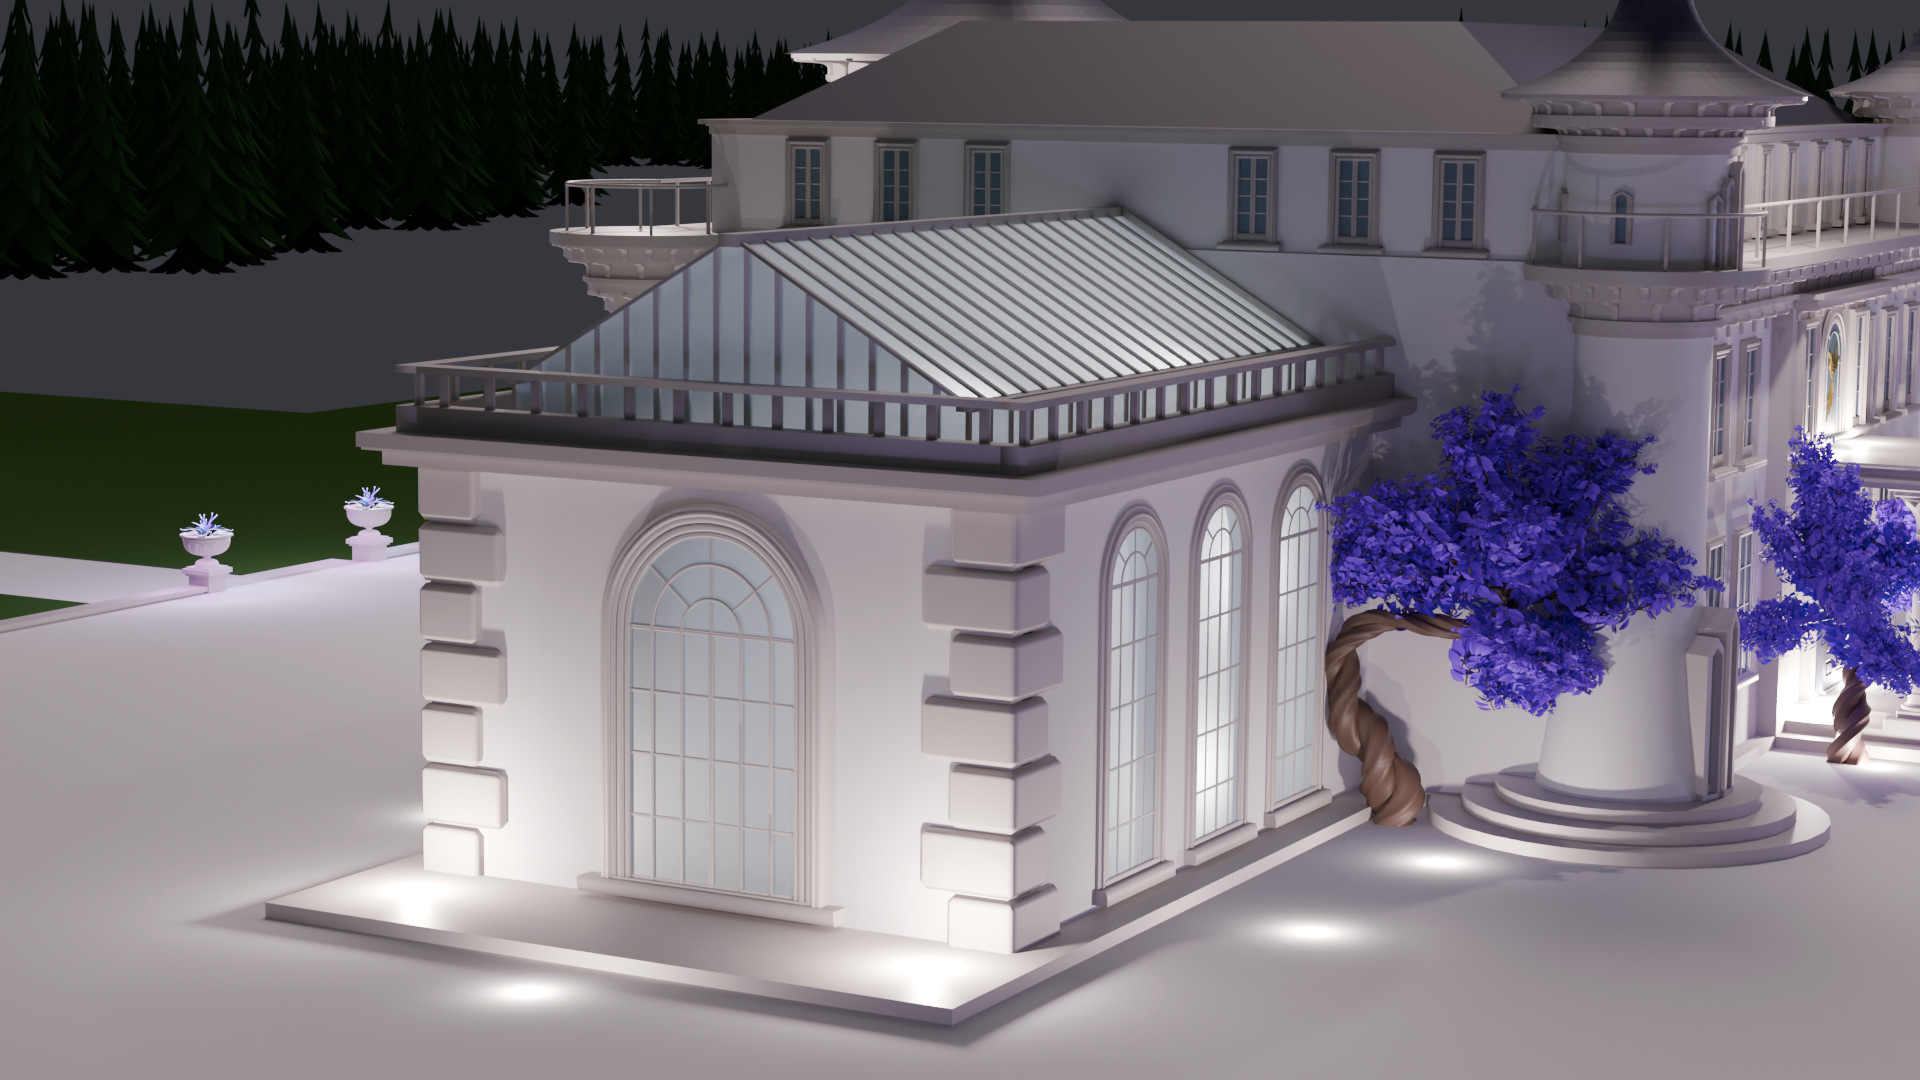
Orangery end window
I also needed to do a bit of work to the steps on the orangery end walls. I had originally had three steps under the end window to correspond with the three front door steps and the steps out of all the towers. But with my decision to go almost floor to ceiling with the orangery windows on the front and back fascades the steps no longer made sense and needed reducing to a single one. I noticed on the ‘Châteaux DIY’ TV series that several of the châteaux that have orangeries / jardin d’hivers as part of the main building have steps down into them from the main floor level which I think is for drainage reasons. So I’ve gone with this for my design. I also needed to raise the stone detailing that supports the roof railings to get the window proportions I liked. This had the added bonus of making the corner stone pattern make more sense, previously the 7th stone was cut in half whereas now the railing supports sit on top of the complete 7th corner stone. I really thanked my past self for choosing to model all of those features with nodes as it was really easy to move and remove them.
So a pretty productive couple of weeks, my new ‘play and evolve’ philosophy is helping me enormously and I’m really happy to be making progress and even happier about the form of that progress. It’s nice to feel like me again.
What’s next?
My plan for the next couple of weeks is to work on the back facade (bacade?!) of the castle, upgrading the main building windows to match the upgraded ones on the front facade and then rework all the tower windows. The big rear tower is the most complicated of the three towers so I’m going to start with that one because I’m hoping to do a simplified version of the window arrangement on the two smaller front towers. These windows are going to be a bit trickier because the towers are curved… and curved things are always complicated. It can’t be as complicated as a faceted dome can it?… maybe it can, I guess I’ll find out!
If you would like to be notified when I post about this please consider signing up to our newsletter - notes - it’s completely free.
Thank you for reading, have a lovely weekend world,
